


Front disk brakes!
I've been working a lot of overtime and collecting a lot of parts. As noted on the main page, the El Camino is now the recipient of all the spiffy stuff and the Chevelle gets the hand-me-downs. First up on the list of things-to-do is the front suspension and brakes.
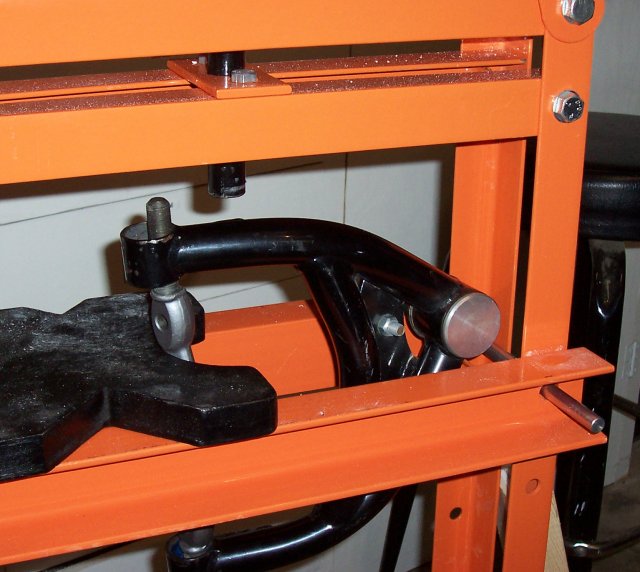
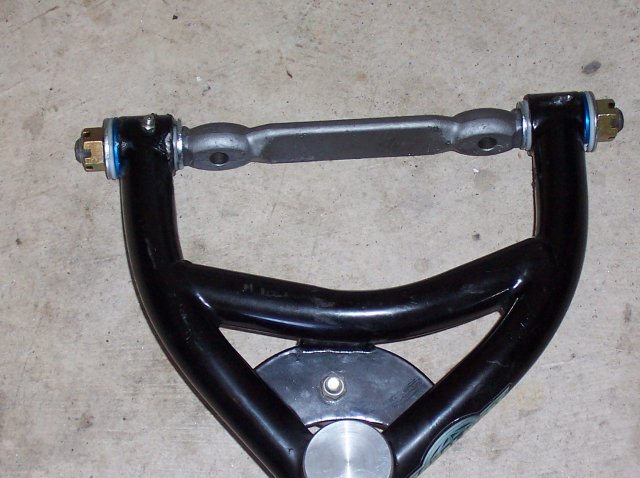
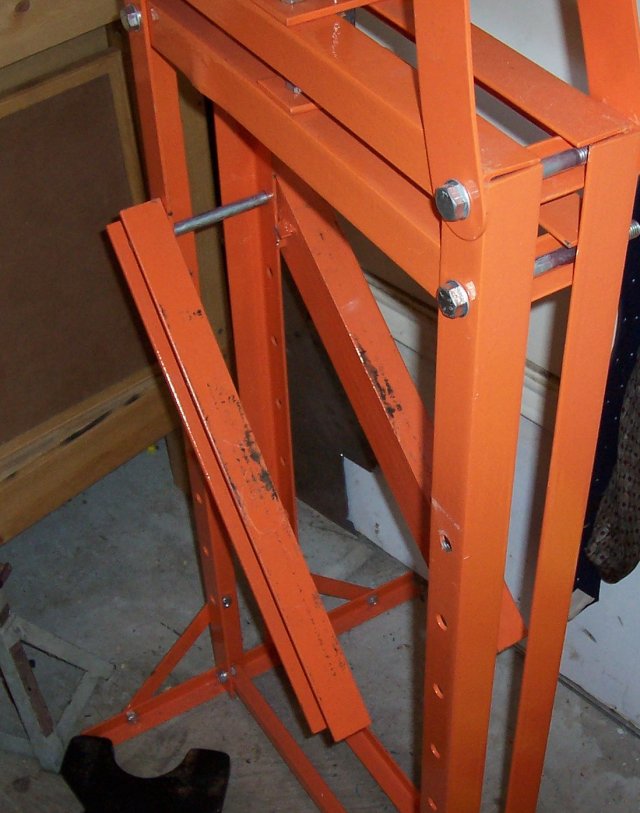
| I'd picked up these Global West tubular UCAs right before we moved into the house. Finally got around to getting the Moog K5250 offset UCA shafts (which are apparently hard to come by these days) and a set of GW's Del-A-Lum bushings, but ran into a problem: The press is just a little too small to put the second bushing shell in. |
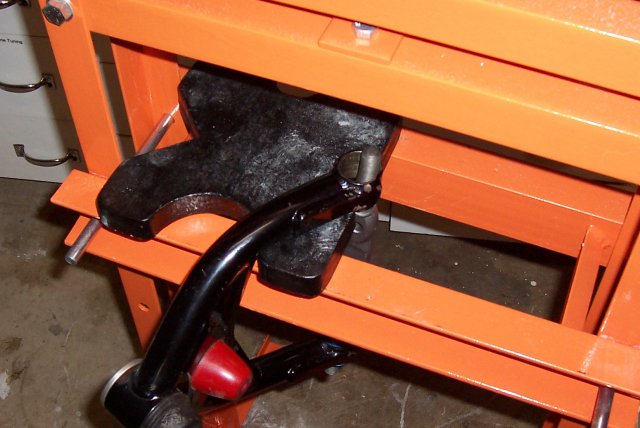
| I could go at it this way, but I wouldn't be able to remove the completed A-arm once I was done. That could be a problem. |
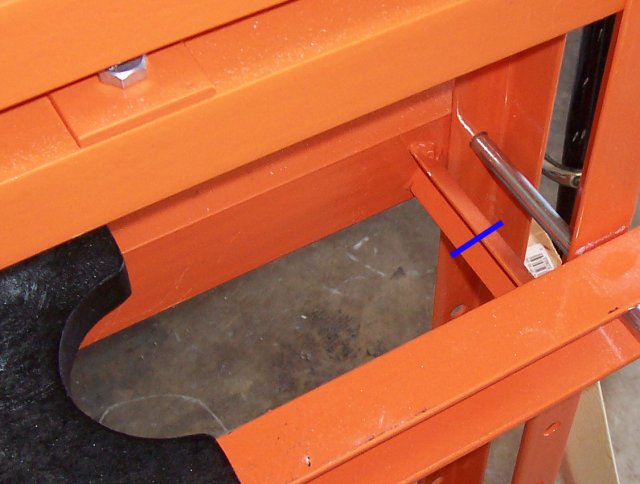
| It looks like if I cut at the blue line... |
| ..and replaced these pins with long bolts, I'd be able to finish all this up. Once again, buying the cheap tool created problems. |
| I've been waiting for 18 months for a decent sale or a 10% off coupon or something similar at Tractor Supply. One finally happened. This is not a cheap tool - but it sure is fun! |
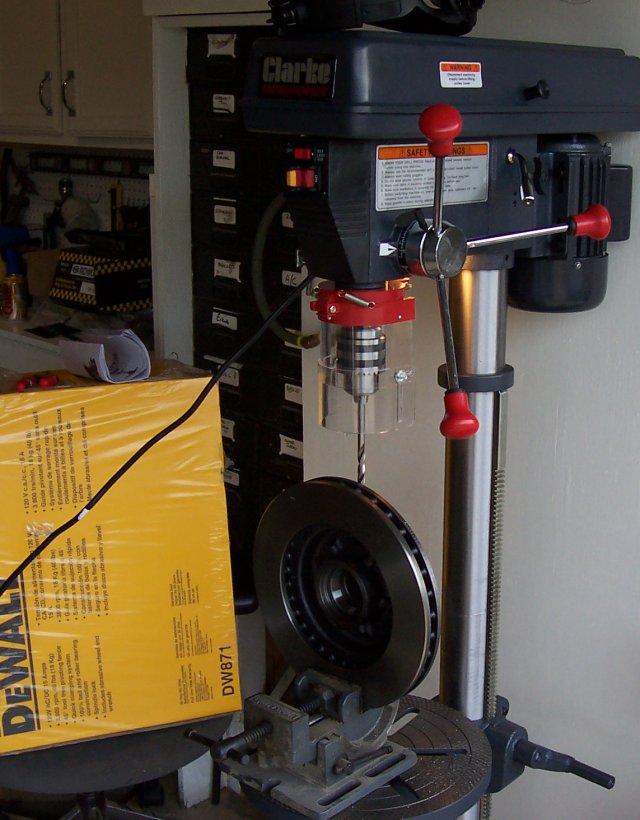
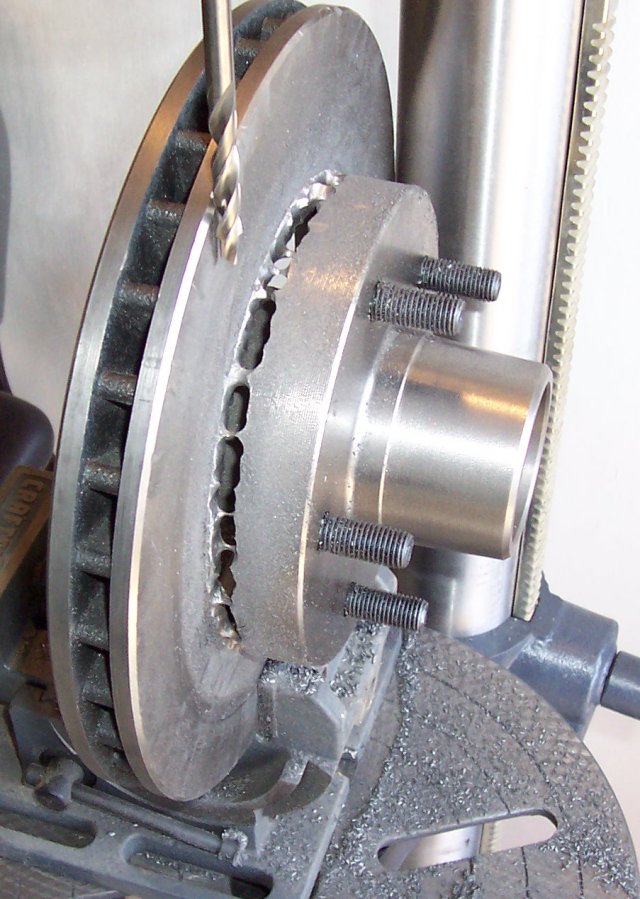
| Finally got a big enough drill press to make the disk brake hubs. This thing rocks. I've cranked the bit speed down as low as it'll go (if memory serves, I'm at 380rpm). The material I'm drilling seems to behave better with the slow speed. |
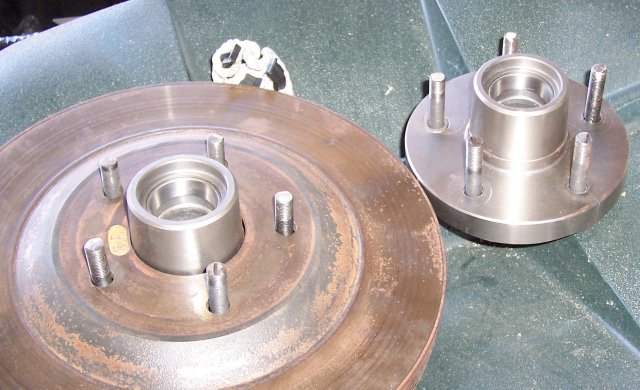
| Initial drilling for the hubs for the disk brake conversion. If you're not really sure what I think I'm doing here, see THIS page - Joe's been a big help through the process. |
| Basically the plan is to drill a whole bunch of holes all the way around so I can cut the hub part off the rotor part without having to spend 6 months with a sawzall. A mill would have been better, or even a lathe, but I don't have those. |
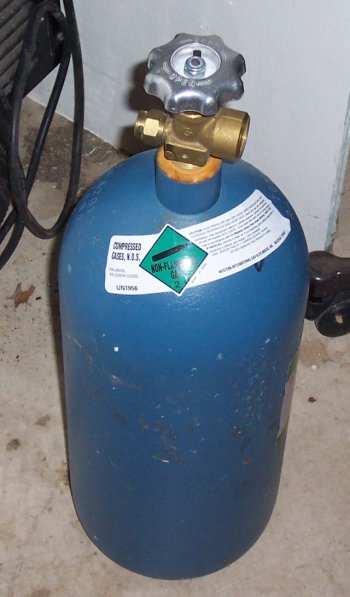
| Not related, but while I was at Tractor Supply, I went ahead and got the gas for the MIG conversion for the welder. Now I need to build a welding cart. Chopsaw will help a lot with that. |
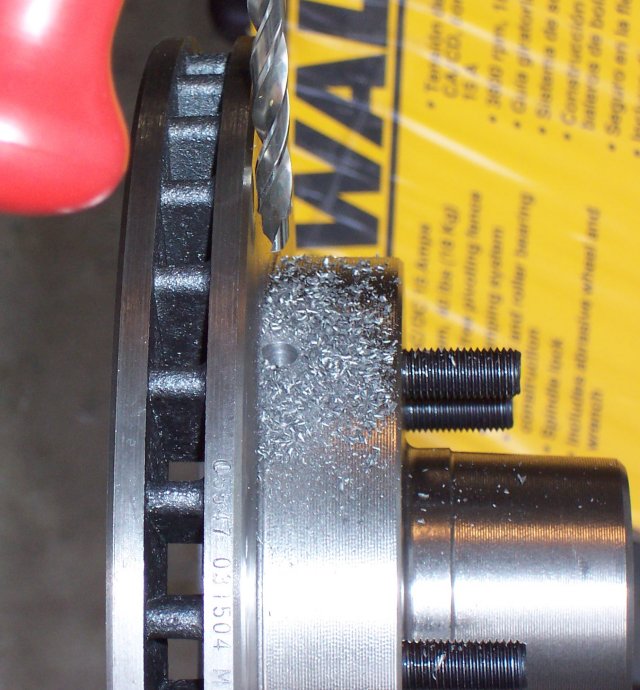
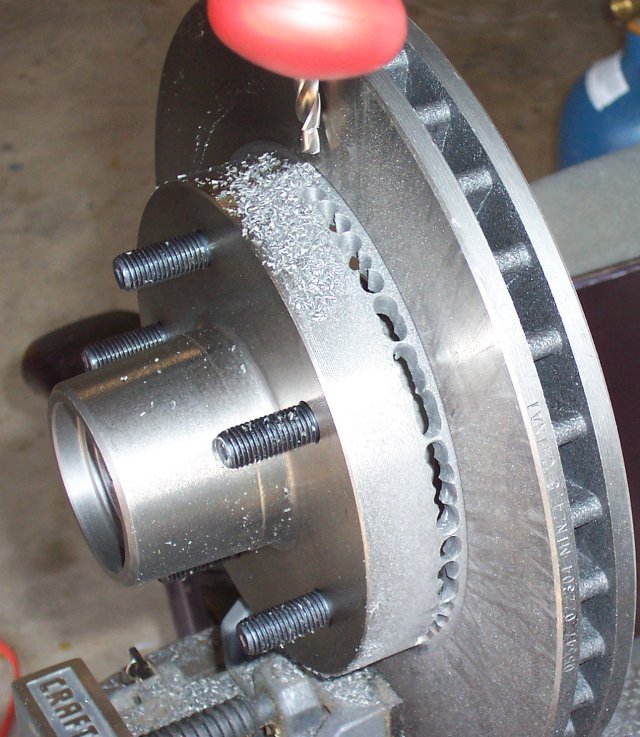
| This is what it looks like towards the end of drilling the hub away from the rotor. A minute or so with the sawzall is all it takes to separate the two at this point. |
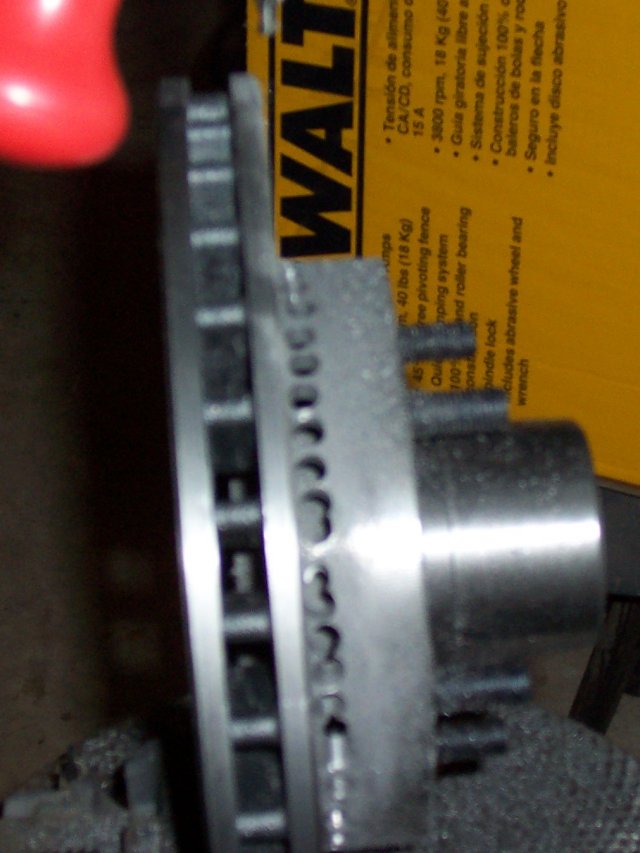
| At that point, you're left with this. It only takes a few minutes with a 4 1/2" grinder and a flap wheel to smooth these out. I could have sworn I took pictures once I had smoothed them, but I guess not since I can't find them now. |
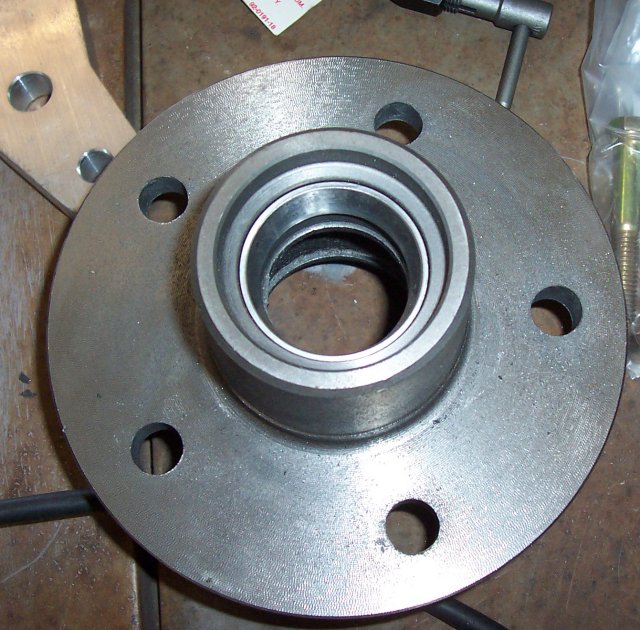
| Obviously, I'll need two hubs. Here's the drilling on the second one. Much like everything else, the second one went much faster. |
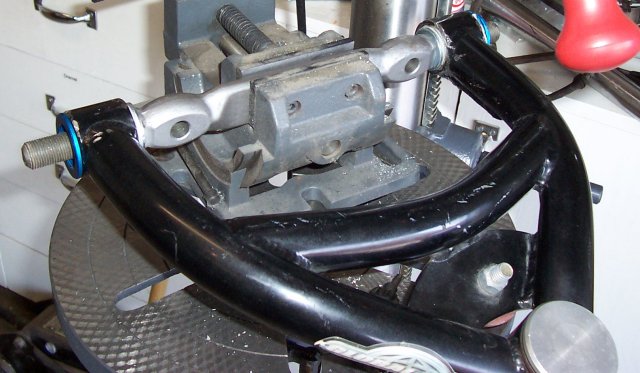
| Went ahead and did modify the press. Here's the UCA with the shaft and bushing shells installed. |
| And here's what it looks like completed, with the exception of the cotter pins which I haven't done yet. |
| Here's the bare 96 Impala SS spindle. Or maybe it's a clockwork scorpion. One of the two. If it's the spindle, the disk brake mounts need to be cut off with that spiffy chop saw. If it's a scorpion, removing the claws is a good idea too. The net result is the same. The hole to the right is for the anti-lock brakes. I've got one of the sensors still (the other had the wires cut.. I might still dig it back out of the trash just in case) - it'd be kinda neat to do something with them, although I'm not sure how well it'd deal with the different rotor-hub setup I've got now. |
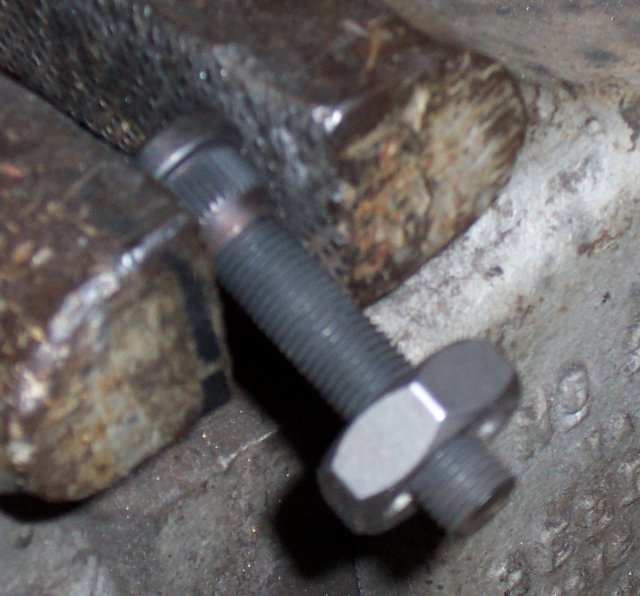
| Next up is pressing out the wheel studs that come in the Camaro rotors - they're metric, and I'm not. Once they're pressed out, the holes need to be enlarged to 14mm so a set of Moroso 46160 wheel studs can be pressed in. (Again with the metric! 14mm works out to be a .551" bit so the .560" knurl works out.) Finding a 14mm bit was quite a bit harder than I expected. Finally found one at either Enco or McMaster-Carr (I don't remember which) but with a bit more searching, I found a source locally: Elliot's Hardware on Maple here in Dallas. They've got pretty much everything - it's where I got the assorted taps and dies I needed, as well as the grade 8 and 10.9 hardware I needed for this swap. I also got some plumbing supplies I needed for the house there that I couldn't find anywhere else (can you tell I'm impressed with Elliot's?) |
| The Moroso wheel studs are too long, unless your wheels are insanely thick or you're running open-ended lug nuts. Neither apply to me, so I cut them off. I put the die on it before cutting to make sure that I still had threads when it was done. |
| One of the hubs after pressing in the studs. Used sockets as spacers when pressing, which dented the hub. The first stud I did I used a smaller deepwell socket that had pretty thin walls - you can see the result on the bottom left. It looks a lot deeper in the picture than it does in person. |
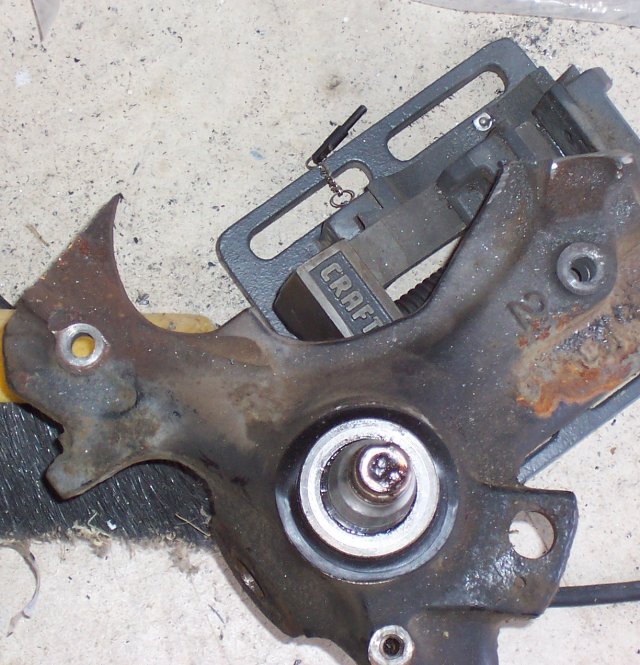
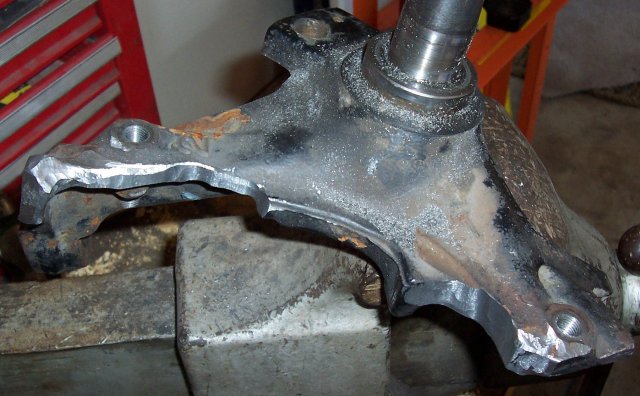
| Here is the first spindle after cutting off the old caliper mounts. I should have cut much closer to the dust shield bolts on both sides. |
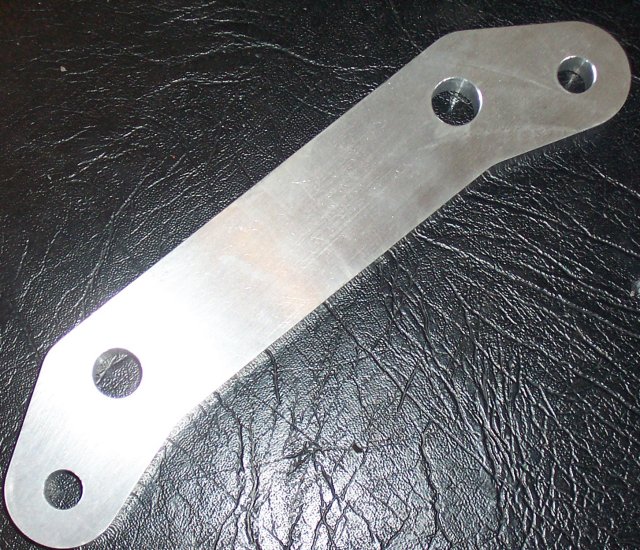
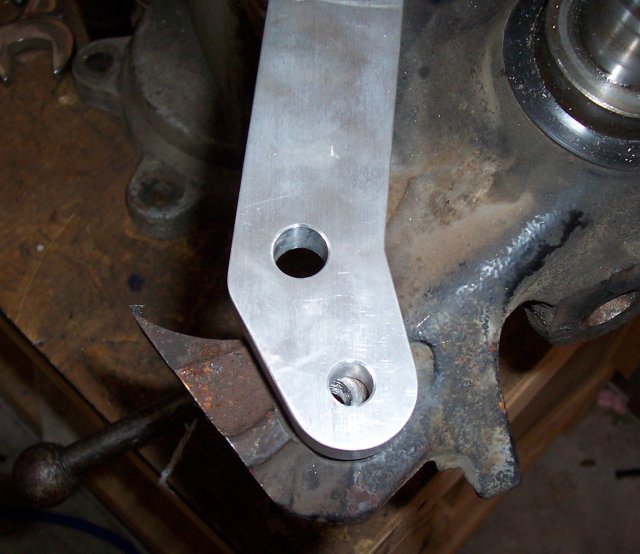
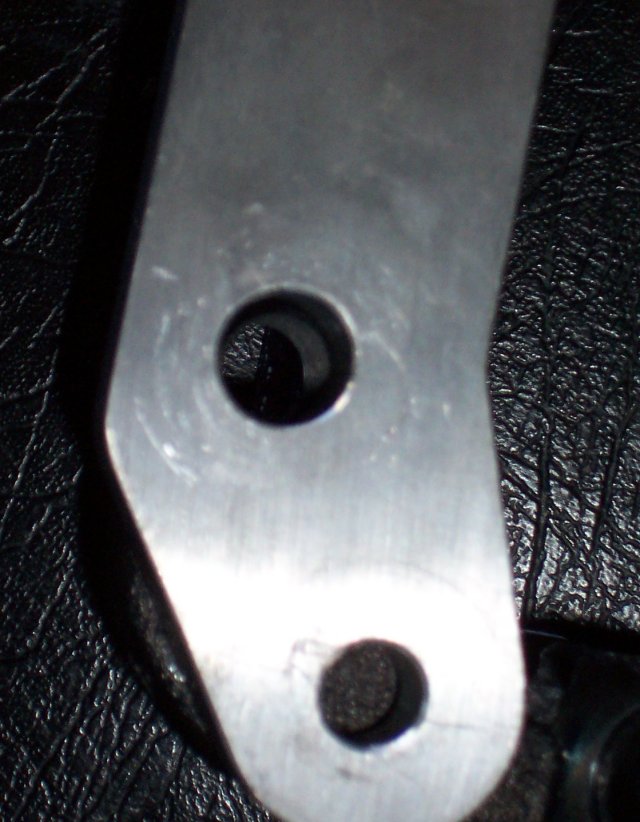
| This is what the bracket I got from Joe looked like. It's aluminum (I think), and shiny. |
| While pressing the studs into the second hub, the press exploded. Maybe a single long bolt wasn't such a great idea. Replaced the one grade 2 6" bolt with two 1" grade 8 bolts and finished pressing in the studs. |
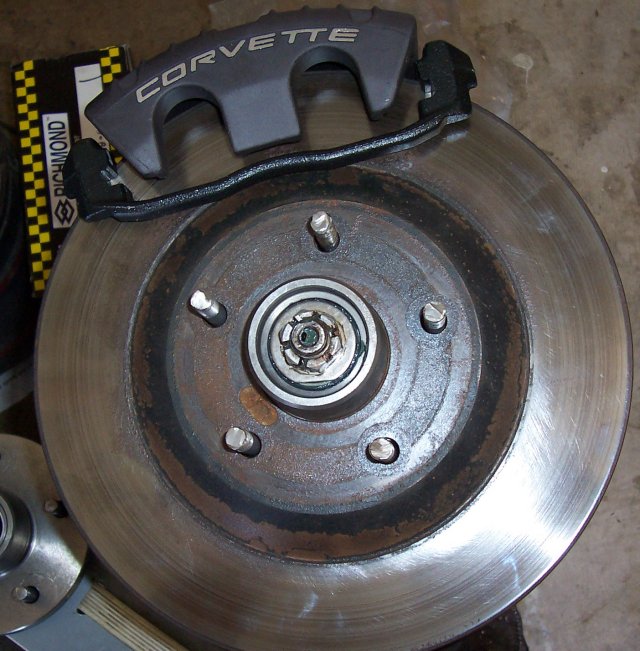
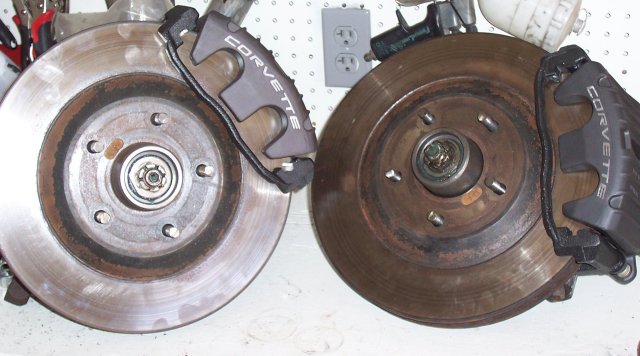
| Once I finished the studs, I went ahead and used the used 2000 vette rotors I have to test and make sure everything lines up - it does. |
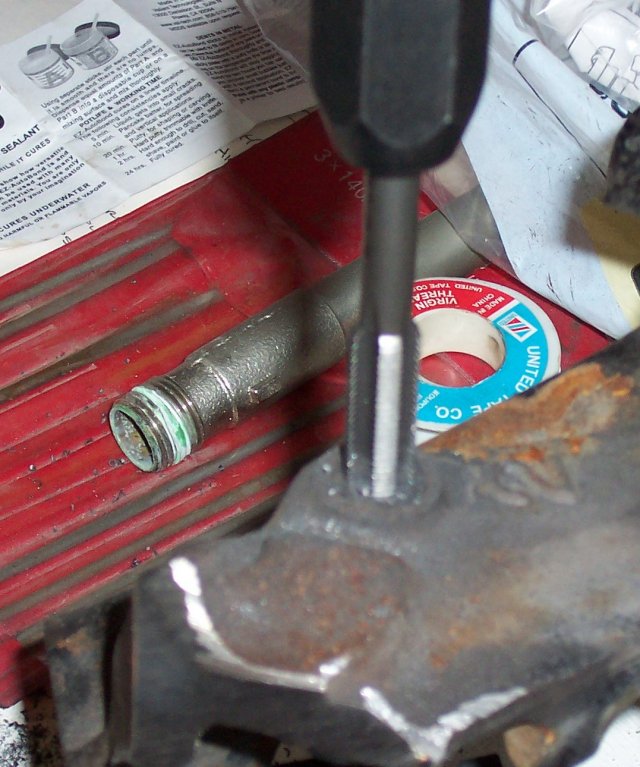
| Tapping the dust shield holes to 7/16". This was fun. And by "fun", I mean a lot of work. |
| The little raised area on the bottom left of the ear here prevented the bracket from lining up with the bolt hole. It needed to be removed with a die-grinder. |
| Similarly, the raised bit on the left side of this ear also needed to go. |
| This is close to the end of modification to this spindle. The main body of the spindle needed to be clearanced for the bolts that attach the abutment to the bracket - and for the socket to tighten them down. I did some cleanup after this pic, but this is the basic idea. If you look at the pic right after cutting off the ears, you should be able to tell how much I had to remove. |
| And then I ran into a snag: the holes in the bracket didn't line up with the holes in the abutment. They weren't off by much, but it was enough that I couldn't get the second bolt started. I told Joe and he immediately Fedexed me out a new pair - which were better, all the edges were radiused and the bolt holes had a nice bevel to them. The new brackets lined up perfectly. I would have taken a picture, but I was too busy using them to make a car. |
| The first spindle-bracket-abutment-caliper-thing is complete. Here's where I learned something cool: The used C5 rotors I'd picked up ("great shape! Only 3500 miles" or similar) were warped. Pretty sure I didn't save enough buying a pair of used ones to cover buying a set of new ones. I haven't put the pads in the calipers because a) I still have to swap out the rotors and b) my hands were seriously greasy by this point. |
| Once I got the first spindle done, it only took me about 45 minutes to get the second one done. I cut more aggressively when I was taking the ears off the spindle, immediately took it to the drill press and perforated the areas I knew I'd need to remove for bolt head clearance, drilled, tapped, and assembled. This rotor isn't so bad, but I can't see replacing only one side. |
C5 front brake lines
69 Camaro rear brake lines (for the LT1 Camaro rear disks)
Master Cylinder (need to check if mine is deep or shallow pushrod)
The quest for an LS1/T56 continues. I've ordered a Mk VII radiator fan and should be getting an LS1 radiator, evaporator, condenser, and lines later this week.
Exchanged the 3.55 rear gears for a set of 4.11s so I think I'm pretty well locked in to doing something with a serious overdrive - like a T56.
Go back to the previous El Camino day (2 May 03)
Go back to the previous Chevelle day (7 Jun 03)